Hardcore V – Starthrower Dominance

I wish I’d wrote more often as I once did. I apologize; I find myself with far less time to do so. I guess I’ve actually been playing longer times. Between this and my real-life workloads (adding in my human procrastination), there hasn’t been a lot of time.

Priority is now set on the new Monk guide for a lateJanuary 2022 release. Now that the new Epic Destiny system is in place, with several new quests, gear and mechanic changes done, I feel more comfortable to get this done. Most importantly, I’ve played enough to get used to all the changes from my 2 year break. One change in the guide will be support for a few multiclass variations. More on this later.

So Hardcore Season V arrived in November and I immediately jumped in, feeling pumped up after surviving the ridiculously dangerous HC IV, which had incredibly deadly monster champions and annoying mimics. HC V, however, is a shorter season (3 months rather than 4).

HC IV taught me a lot of lessons. As a result, some HC IV vets I transferred to Ghallanda are still with a death count of zero, and a new starthrower I made there was deathless until L22.

Happily, HC V is basically a clone of HC season 1, including the same cosmetic rewards, including the really cool looking Death Walker Sash, now bearing the HC V logo on level 20 achievement. To me, it should look dazzling on Monks with a Ninja cosmetic or similar attire. No remarkable “gotchas” in HC V. Your basic skills from a non-permadeath server should work here.

That doesn’t mean that the world-announcements of obituaries haven’t been saddening or just outright humorous. Causes of death have included several preventable ones:

  • The Ancient Magma Brute (Heart of the Problem). This fiery earth elemental in the L3 “Lost Gatekeepers” chain has been owning players who have gone in far too unprotected from fire (both Fire resists AND absorption are needed here), and likely have too small a party. Soloing in HC is ill-advised, and hirelings can only do so much. The Magma Brute likely earthgrabbed the players and crushed them, and players are also likely distracted by his many equally fiery mephit minions.
  • “Misadventure.” That’s a kind way of saying “You found a trap using your face, removing your head from your body.” As with any DDO server, you gain a few DDO Points that you can cash in from the DDO Store. Don’t be cheap and buy a Rogue, or ask others to help. If you have bought the Saltmarsh expansion, you’ll get Froggo, an L3 Rogue that’s got skills; he’s cleared traps of L7 Elite levels. I worry less about traps as an evasive, high-reflex Monk. Others need to pay more mind.
  • “Non-localized trap.” These are commonly the large ominous blue, yellow, white or red circles appearing on the ground, created by some boss monsters or superior monsters warning you of massive incoming area-of-effect damage that can be easily countered by literally stepping out of those circles!
  • “Falling.” Really!? Feather falling items are all over the place now. A DDO Store visit can fix this for peanuts. And stop running! At least, stop running unnecessarily; pay attention to narrow places where you must move or jump.
  • “Your Constitution points fell.” Rage or otherwise artificial hit-point boosts might wear off when your hit points were already low, where you unexpectedly commit suicide. Heal up BEFORE removing any gear that adds Rage, False Life, Vitality, or Constitution, and definitely don’t use your guild ship’s amenity buff recharger before you’re at full health.
  • Spellcasters with magic missile. Far too many players have been eaten in “The Swiped Signet” and “Proof is in the Poison” quests against the hordes of Swiftfoot spellcasters there. Hjo’s learned (for the last time, I think) how pixie enchanters in the Feywild’s final quest “Immortality Lessons,” ruin your day and your hardcore character’s life. So now everyone in our party makes regular checks on whether our Shield spells are active. I’ve added points to Use Magic Device to all of my HC characters now; getting Nightshield is easier that way if I can’t find a Shield clicky. For Saracletica, her Feydark Illusionist enhancements add permanent Blur and Nightshield.
  • Death by elemental damage. Low-level players were getting zapped left and right by Kobold Shamans. No reason not to buy and use Fire, Cold, Acid, and Electricity resist potions from the Marketplace early on. Wearing elemental absorption items or using potions help, too. By level 6, visit the vendor inside the Catacombs for improved 20-poiint resistance potions (you do not need to complete any Catacombs quests to use this vendor).

While I did complain about the butt-ugliness of the HC IV tentacled sash, I wear it with pride on one of my three primary characters as I level up. So far, only 1 death, and that didn’t occur from a monster, unless you want to call it the Lag Monster. A nasty lag spike happened a few days into the season, while my first Mystic stood in the Borderlands wilderness, free of nearby enemies and just minding her own business. Next thing I know, death by falling–sideways and standing stationary, apparently.

I moved on and built these four characters, which are all still living.

  • Saracletica: A Ninja Spy Halfling that’s essentially identical to HC IV L20 survivor Petracletica except she’s got 1 Rogue level. Thanks to fellow guildmates I’ve learned how incredibly well you can make a single Rogue level form into an excellent trapper. Combined with the natural evasive and attack skills inherent from the other 19 Monk levels, soloing (as needed) with Sara has been wonderful. Shadowblades remain incredible weapons to clear most every enemy.
  • Karacletica: My stock full-Monk Drow starthrower, also a Ninja Spy. I use “starthrower” to differentiate from the classic “Shuricannon” description. Why? Because Falconry enhancements didn’t exist for it, nor did substantial changes to the ranged attack mechanic from Update 49 to reduce server-level lag. Further: There are many new items, from named set items, augments and weapons that make prior Shuricannon types obsolete. I had a starthrower in HC4 that survived the season but time didn’t allow her to reach beyond L16.
  • Cyncletica: A human L8 Henshin Mystic. I’ve been experimenting in PRR and AC boosting with this one, adding a bit of Shintao enhancements into her. Her Ki Shout intimidation is a great enemy management system. We’ll see how she works out.

I envy the players who have not only leveled to L20 rapidly but have true-reincarnated already to level up again. The small married team I run with (now guildmates over three servers) are still content on our 1st lives as we punch up through L12, running L8 Elite quests to gain maximum favor. We have a month left before the season ends on February 1.

With three active characters I’ve begun moving the more independent Sara forward to race to level 20 to get that sash unlocked. Kara the starthrower is teamed up with Hjo’s Nixiken, who is new to starthrowers but is absolutely loving it. As Hjolan, he taught me how 1 Rogue level was really practical, and he wanted to try something new. So dungeon clearing has been increasingly efficient, with my full-Monk starthrower, his Monk/Rogue starthrower minding the traps, and Paw, Hjo’s wife and capable Pale Master throwing spells and melting things along the way. Holy Smiting hirelings Nimeth (L8) and Tonya (L12) are just a joy to rid ourselves of trash.

Two starthrowers in party are really nasty. Why? Sneak attack. Both of us, Ninja Spies, are armed with Barovian shuriken, and have points in Sneak Attack. If we gang up on any enemy, that foe can focus only on one of us at a time, which negates sneak attack from one of us. But that means that enemy is always getting sneak attack damage from one of us if that monster race or type allows it. And let’s not yet count the combined Helpless damage with our No Mercy enhancements (Ninja Spy and Falconry have this both, and they stack).

Both of us are training up Falconry, tripping and blinding lots of stuff. Many mobs are dead long before they get close to us.

There’s also a cool feature of Faerie Fire, a spell-like ability from the Drow enhancements. Until now I rarely used it. But Hjo, being the experimenter, learned that it is awesome to clear breakables. It’s essentially a Fireball but costs only 1 spellpoint. In addition, it’s a good thing to throw to reveal hidden spiders or monsters, as it temporarily removes Blur, Displacement and similar obscuring effects from most enemies.

More to come, and more timely, I hope.

Hardcore Monk V: Victory

For my goals, at least, I “won” in the Hardcore IV season.

There were several goals a player could aspire to meet. Since I was new to Hardcore play, I chose only two: 1) Reach 1750 favor, and 2) Reach level 20.

I did both, and using the very first Hardcore character I created: Petracletica, the Ninja Spy.

It wasn’t easy, but it was fun. I’d like to say I survived and succeeded by skill alone. But as many of my friends (most also in my Ghallanda guild) would say, luck played a big factor.

As noted in past posts, the greatest challenge in HC IV was surviving the special Monster Champions present there. They were even color-coded for your convenience if you had a good Spot score. Some you knew to be careful not to attack too harshly in melee or get a stacking disease effect that could kill you faster than you could remove it. Another champ was the spellcasters’ bane with their Rage spell that left players Silenced. Another would have Poison attacks that often weren’t a big problem unless the champ was also a caster that also added their own nasty elemental spells.

It was that Poison-armed one, the Disciple of Avassh champions-as-casters, which often killed my party members with a single attack.

But why did Petracletica survive caster after caster, enemy after enemy?

She was the Master of Hide and Seek, I think.

A newer guildie on the HC server was dismissing the use of Sneaking while Petra was clearing level 10 quests while banking Level 15 at the time. One of his builds was a caster, like a Pale Master build that is admittedly quite good at clearing and soloing.

But because this new guildie is joining my Ghallanda guild (where Monks are the dominant class) I had to school him with some information–the reason why Petra likely survived to Level 20.

The Hide and Move Silently skills were, in my opinion, the most powerful abilities that Petra possessed. As I told the guildie in chat:

  • NO enemies would know I was present unless they possessed tremor-sense (bats, spiders), life-sense (some undead), or were some bosses that would know of any enemy in range (rare). True Seeing does not reveal a hidden player. A good Listen or Spot skill would–but most enemies don’t possess this.
  • The H/MS skills, together, allowed me to control when and how to strike an enemy. This was particularly useful since I could slay some champions before they became a threat to my party, flanking them and ending them with the Ninja Spy’s sneak attack combined with her weapon effects and enhancements.
  • H/MS likely saved me many, many times from enemy casters that would attack you from long range.

As noted previously, Petra was a Halfing with the Dragonmark of Healing to make her somewhat self-sufficient to cast Heal and related spell-like abilities limited times for myself or others. The added sneak-attack dies from the Halfling tree combined with the Ninja Spy versions for powerful first strikes.

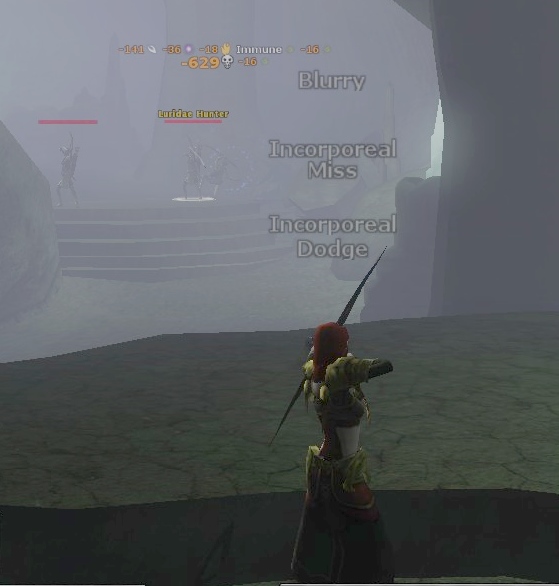
Lastly, the Feydark Illusionist tree was a godsend. Just a few points invested and I had Shadowblades: Force DR weapons that bypassed almost every DR, including incorporeal. But their power really came to the fore by levels 12 and higher. They gained Phantasmal Killer, snuffing out enemies very, very fast. While each blade would not proc very often, carrying two blades as a two-weapon fighter made Petra quite the room-clearing Monk.

Other tricks were standard monastic fare to help: Flash Bangs to momentarily stun and blind to make removing most of a mob quick and easy. Subtlety enhancement to reduce the aggro level from melee attacks. The list goes on.

There wasn’t anything very special in surviving, as far as I say otherwise, except that I realized a few critical points to remember in clearing quests:

  • Avoid most quests that had beholders. While I would be far more equipped to silence and slay those oversized eyeballs than other melee classes, I didn’t want to take the chance. I made one exception: The Threnal quests, where I would be required to encounter two or three in the course of the quest chain. And then, I sent the hirelings in the party at the monster first.
  • No Xoriat quests such as the Harbinger of Madness chain. Same reason as the first, but Thaarak Hounds were a greater threat to me since they sense sneaking with their blind-sense and their own brand of Phantasmal Killer.
  • Run Elite only to reach 1750 favor. After that, I ran no quest higher than Hard difficulty. This helped survival for sure.

But before you think that Hard reduced the chance of death significantly, I will tell the story of the late Lamai, a powerfully great Bard at level 12 who explored Castle Ravenloft with me (on a different ninja, the star-thrower Rubycletica) on Hard.

The run in “An Invitation to Dinner” was going just fine. As we approached the Chapel on level 2 of the castle, there’s a spot I know will be filled with wights and ghosts, with 1 or 2 Wight Priests certainly there.

Ruby, as a ninja, was sneaking. I spotted a priest. It was a Disciple of Avassh champion. I had prepared to use my raven and Falconry’s trip attack to take it out. But before my shot had hit its mark, the caster saw Lemai and fired off two attacks. His Bard songs helped blunt one element of the attack, along with a timely heal by my Favored Soul hireling, but another part of the attack caused the dreaded “ding” in my headphones as Lemai melted from poison.

Hard difficulty could and would be happy to kill you. I stayed that course to level 20.

Of course, the chance for a mimic spawning with any chest opened increased in potency. By level 16 I could definitely see how the mimic’s CR increase made it harder to kill them off than earlier. Their acid damage increased as well. Myself and others running with me did not hesitate in breaking off a quest chain to get “P-Buffs” from House Phiarlan before entering another quest as we leveled beyond 10.

By Petra’s arrival at level 17 or so, she had Gianthold quests and later, those in Sharn. But in recalling how nasty the halflings in Sharn could be, especially with their artificers’ hard-to-see exploding construct spiders, I concentrated on all of Gianthold. With completing “Gianthold Tor” (after playing all but “The Crucible”) I reached “maximum heroic XP.”

I’m happy to complete Hardcore, and grateful to get my cosmetic awards.

But why oh why, SSG, are these cosmetics so butt-freaking-UGLY in comparison to the previous HC cosmetic rewards?

I mean, I know these are in theme with the season of Xoriat-based monster champions. But this design? I don’t ever want to wear these with anything, much less proudly wear them as a HC survivor.

Congratulations! You get to wear…clawed squidskin.

Anyway….Petra was immediately retired from play to complete HC. I don’t expect a high score on the leaderboards; not my goal. Rubycletica and two others continue play to gather gear and aid other friends to level them up and meet their goals. Since HC rewards are by-account, it’s not necessary for any other of my characters to survive, so I can be a little more aggressive.

Now to plan the final HC strategy: What comes over from the HC server to Ghallanda at season’s end with the free transfers. I have gathered a lot of good gear. But I already have 29 character slots on Ghallanda! Somebody there has to leave before I must buy more slots. I think only 2 characters are coming over.

Hardcore Monk IV – The Dark Before The Light

I’ve typically had three active characters on the Hardcore server. A “main,” or leader character with the most advancement, synced with my Ghallanda guildmates who I accompany. A secondary character is played that I tried to keep no more than 3 levels less than the main. A third or even 4th character are warmed up and played to at least Level 5 or 6 in case the worst of the worst happens.

That worst almost happened a couple days ago.

I’ve typically sent characters into quests or chains to farm on Normal or Hard difficulty. The Feywild became very attractive for its set items that would greatly add to survivability for all.

And during my off-days from work I played alone, accompanied by one or more hirelings, to complete some quests on the secondary and tertiaries, although never with the main.

The first to go was Dianacletica, a Zen Friar archer which was left in a performance crisis with the bow changes of Update 49. Losing the use of Ten Thousand Stars for bows, she was enjoying the use of the bow but with no applications available to her from being a Monk, save the passive feats and enhancements. At Level 6 or so she lacked sufficient base attack for Manyshot. So I put her to work on leveling.

I had her in work in clearing “Redfang the Unruled” when I encountered the room with all the poison traps. I had the cute and reliable Rogue hireling Kirsten to assist with the traps. But getting her to each area for the control boxes proved too much for Diana. Lag didn’t help, and Diana fell to “misadventure,” her level lacking sufficient protection or evasion as she was poisoned to death.

I carefully took stock of the situation and returned to Feywild farming on Rubycletica, the Level 7 starthrower, on Normal quest difficulty only.

During one of many runs into “The Knight Who Cried Windmill,” a lovely and short quest with a fun allusion to Dante’s literary knight, Don Quixote, something weird happened. It wasn’t death, thankfully.

On a Heroic Hard run, I encountered my first-ever feytwisted chest.

But wait. Aren’t these things supposed to drop only in Legendary Feywild quests and wilderness area?

Well, I didn’t argue with the game and accepted the reward. It’s too bad that few feytwisted items are suitable for Monks.

Ruby is my 2nd starthrower Ninja Spy attempt. Working with the weakest weapon in game, as well as the most scarce, I opted on stacking many secondary effects to greatly improve her damage. More on her later if she reaches Level 9.

Shortly after Diana’s demise and after logging out from a fruitful farming run on Ruby, I opted to take in Serethetica, my Level 9 Mystic, into an Elite farming run in “The Endless Revels.”

She attacked some pixie in the shrine room, which apparently was a champion, and the Mystic quickly died, likely a Stained or Symbiont of Ysgithyrwyn, which can deliver quickly lethal stacking debuffs.

Losing two characters in two days took me aback.

But for some crazy reason, I put my trust in farming the Feywild some more with my main, the Feydark shortsword wielding Petracletica, currently L10.

Several successful runs in the Part 2 quests yielded a few more great items for her use, including the awesome mage-hating Gloves of Tranquility. I stopped when I was ahead after completing that.

Petra’s in need of more HP (aren’t we all?) to survive hits. I’d love to add a Indomitable Wrappings belt for her and are still considering it, but it would mean I’d give up the powerful Haste effects of my Black Dragonscale Tasset. The Mimic Hunt level 8 reward would add 30 HP, but waiting to use the level 12 version to give 40 HP seems more tempting.

However, temptation has what gotten me killed lately.

Petra is loving Feydark Illusionist. At level 9 or so, her blades upgraded in power. In particular, the blades have Nightmare effect on them, which often instantly kill with its Phantasmal Killer. A bit more AP investment had also added permanent Blur and Shield on her, significantly increasing her innate defenses. She needs more Dodge (and may reach as much as 38% if she survives) and has lots of Incorporeality to help in fights, but she has been surviving well. Another AP point will also allow her to remove her own negative-levels or other effects from her Dragonmark.

In party, Petra’s high stealth leaves her an opportunist assassin, taking on the nastier bosses by flanking any mob and throwing Flash Bangs to buy the party time when we become momentarily overwhelmed. Good stealth often allows us to avoid fights to get to switches and quest items, which I’ve done more often.

The scariest thing Petra lacks are the now-difficult to farm Visor of the Flesh Render Guard Death Ward clickies. I have only one, and am reticent to use. But as it can’t protect me if I don’t have it in inventory, so I’ll have to add it to Petra’s growing equipment stack.

Petra’s Halfling Dragonmark, the healing ones, saved one party member in a surprisingly dangerous Elite “Memory Lapse” when our player Cleric, Sparkpaw, was incapacitated in an expected ambush (of which I neglected to warn about). Fumbling with my toolbar, I was able to throw a Cure Moderate Wounds on her but was too late to save our second player Cleric, Tilla, who took a fireball directly to the face.

After a death, our party often rolls up new tertiary characters.

My two recent deaths were both Light Monks. And there were two more Light Monks before that which met their maker.

But only one of the three Ninja Spies I’ve made have succumbed.

Imagine that. The Monks with no innate combat self-healing are doing well.

I might’ve cursed myself now by saying that.

I’ve rolled up a Warforged Shintao. Let’s see how she works.

Hardcore Monk III – Less Paranoid and More Prepared

Since last writing, my Hardcore level 6 starthrower, Stelacletica, got one-shotted in the Crypt of Gerard Dryden, likely by a champ with very energized magic missiles. I had just got her gear and most other effects working except one, which was a big sad.

Of course, a dead character takes their inventory and equipped gear to the grave, which is problematic when you farm for something nice, only to find it buried for the duration of the season.

But unlike the last death I experienced, I felt more determined than depressed about it. And I really wanted a ranged character in Hardcore.

I revised and revisited my Zen Friar build. My original build (which will be in the revised Monk guide–its updates are about 1/4 done!) used a Wood Elf’s racial skills as a central tenet. In my first archer on Hardcore, the late Loreicletica was an Half-Elf instead to add Cleric dilettante abilities for self- and party heal and buff options. I still think that’s a good idea, although the lack of innate longbow proficiency cost me an extra feat over other builds, making development of the build slower.

So Dianacletica was born in the Zen Friar’s original design, a Wood Elf to take advantage of ranged power, incorporeality and missile deflection enhancements. Dominantly an archer, this Light Monk build can also wield a quarterstaff, mostly to build up ki for buffs if needed. It’s still a work in refinement for reasons stated in a moment.

So far, Dianacletica was rather inexpensive to build and is at full basic form at Level 6, thanks primarily to fixing an oversight in the original build.

As you know, I am a big fan of the Falconry tree, which uses a summoned bird to support you with trips, blinding, fortification bypass, and other ranged or melee damage. Falconry adds some ranged power but, more importantly, allows uses of WIS as your to-hit and damage stat, just as Harper Agent allowed INT for this, Ninja Spy allowed DEX for it, and now Feydark Illusionist does for CHA.

There were two Killer Instinct enhancements, one that gave to-hit by WIS, and the second for damage by WIS. In my original build I took both for my Monk. But that wasn’t necessary at all, thanks to the one feat that allows a Monk to use a bow as a ki weapon in the first place.

That’s Zen Archery. It’s description: “You can use your Wisdom bonus instead of Dexterity bonus to determine bonus to attack with ranged missile weapons if it is higher.” That’s what Killer Instinct I does.

So I saved 2 AP that I could apply to something else, only requiring Killer Instinct II for WIS for damage. That “something” was in getting the Henshin Mystic tree completed enough to add Lighting the Candle, which adds Fire/Force damage to all weapons–a bit less on non-quarterstaff weapons, but a very helpful addition.

Dianacletica is also now a bit more paranoid about champions. Priority on building will be increasing HP first over damage through any enhancement and gear available, since the most dangerous problem is getting one-shotted by a champion (twice for me now) by some effect. Naturally, the more hit points you have, the less likely you’ll die.

She carries and more proactively uses several Shield clickies before engaging many mages that might have magic missile. And since she doesn’t have any enhancements to avoid getting Feared, she does carry a lot of Remove Fear potions to ward off the killing fear debuff of the Valaara’s Leg champion.

I will likely try to run the Attack on Splinterskull chain at least twice at Normal to carry at least two Visors of the Flesh Render Guards for Death Ward from the chain reward, along with having a player party member or hireling with the spell when at all possible.

Through some lengthy farming runs on my HC Mystic, I got a useful Greatbow of the Scrag for Diana, with its good blunted ammunition and higher base damage, along with a Giant’s Roar bow to vary things up.

So I get all of this running happily for Dianacletica and then Wednesday 4/21 shows up.

It’s Update 49 time, and this is a big big change that hopefully will improve something that players have cried about forever to fix–and that’s lag.

Even the release notes for Update 49 read like a light novel, as it details what is being changed to reduce the cumulative effects of game servers calculating every single little damage calculation, which slowed down the server performance for you or others, no matter where you were.

Effectively, the amount of floaty-text damage will reduce as the server takes a different and more efficient way to show your doublestrikes and doubleshots or other mass-effect damages.

Bows were specifically targeted in this update, with new animations to support changes that add more damage, slightly faster animations, an inherent use of DEX to-hit and to-damage for bows (which I assume is overridden by other enhancements) as well the change of Manyshot from a slow high-burst damage feat to a pulsed, more efficient feat.

There’s more, but what interests me, and what was not directly answered in the release notes, is how the Ten Thousand Stars feat changes with this update. Like Manyshot, TTS was a burst damage effect, primarily for shuriken, but useable with bows or any other throwing weapon that you can make a ki weapon. It added doubleshot and ranged power effects based on your WIS ability.

There is no information on if, or how, TTS has been adjusted in reflection to the changes to the bow-based Manyshot feat.

What was also noted that the update does nerf, for now, non-bow attacks, as the update changes the relative attack speed bonuses of certain feats but without changing how thrower animations work. I will have to visit my Astracletica starthrower on my home server of Ghallanda to see what’s changed there.

But for Dianacletica, I’m concerned about general damage, her exclusive use of TTS for burst damage, but also an aesthetic: The Wood Elf already looked great in carrying a bow as they ran. Sounds like I’ll get a different appearance, which is sad.

I have seen bow work on Lammania from a popular DDO YouTuber which looked promising for the standard non-Monk archer. Perhaps now I can revisit the original Zen Archer again (as well as other Zen Archer variants I made) and save feats or AP since DEX to-hit and damage is already present on bows to make them more useful and fun.

I can feel optimistic about one thing overall, as we all should everywhere but especially on Hardcore: The risk of lag death should become much less. Less risk for movement lag which “pushes” you into a trap, or that perhaps causes you to not be able to react to distant mage’s missile attack.

I would happily own the cause of death from my own mistakes rather than feel depressed that the game killed me because it simply was too overburdened.

Hardcore Monk II – Death and Life Everlasting

I always felt that some of my tips for defenses on a Monk were generally ignored by many players. Things like miss-chances and certainly fortification go a long way, as well as the benefits of finishers, particularly those of the Ninja Spy.

But in Hardcore, I’ve learned everything matters. Everything.

I’ve created four characters now, with the 3rd week in play.

The first order of business for all of them is the persistent use of acid-absorption items when opening a chest, which could always spawn a deadly spitting mimic. Other elemental absorption gear, from rings, cloaks and outfits, tend to drop well, and most are well-geared at present. So has fortification items, thankfully.

But what I did not prepare for as well were the special Hardcore monster champions, based on the other crazy Daelkyr of Xoriat.

During party play, in the 2nd quest to rescue Arlos, we encountered a kobold shaman. I knew to be wary of them already with their potent lightning damage and concealment fog that makes them hard to target.

I had my newer build, a Zen Friar, on the attack. I had just glimpsed the monster and its reddish champion name and popped a Falconry Diving Shot attack in hopes of tripping it.

Moments later, a Fear symbol appeared over Loreicletica’s head, along with a banner message that appeared too fast for me to read.

Seven seconds later, Loreicletica was dead. And as you know, you have one life to live in Hardcore.

I read up on all these special champions after that demise.

Of the nine champions, the one that killed me is the most dangerous: Valaara’s Legs. Each champion has a special quality with other special defenses or attacks. In the case of Valaara’s Legs, after review on the wiki, I discovered:

The fear of death is upon you! If you do not remove this fear, you will be stricken by madness so painful it may destroy you!

“NOTE: Once this champion hits you, a 7s timer appears on your debuff bar. The debuff icon is simply a fear icon with a red edge. All the champion’s hits, including spells, proc it, but it has an internal cooldown to re-proc the debuff on you, almost 8s cooldown. 7s timer on all difficulty. Remove fear spell or pot to remove this debuff, or Hafling/Aasimar’s Bold fear shake off will work.”

So that’s how I died.

My two survivors are Serethetica, an Aasimar Henshin Mystic, and Petracletica, a Halfling Ninja Spy. Both have the Bold enhancement that will remove fear or shaken effects by 3 seconds with that enhancement maxed out with 3 AP.

Both characters also carry the unbound Remove Fear potions from the Marketplace on their toolbars, to apply to party members that show that red-lined Fear symbol.

Other champions aren’t much better, but slightly less deadly.

With the archer’s demise, I decided to create a new backup character. And that’s the effective limit of players I should have. It takes time, especially with all the cautiousness you and your party have in proceeding through a dungeon, in the number of characters you have in work. Altitis in Hardcore means you’re not progressing fast enough to reach any of the rewards. Best to stick with one character, and that means a lot of coordination with members in your party in clearing quests at the highest possible character level for that dungeon before Hardcore lockout, 4 levels above the quest’s base level, kicks in. For example, the highest player level that can enter a Level 1 quest (no matter what difficulty level you select for the quest) is Level 5. Go to level 6, and you’re locked out of that quest forever with this server season.

But back to my 3rd character. I realized I erred the moment I made Stelacletica, a Drow Ninja Spy.

She’s using the weakest weapon in the game, the shuriken.

In non-hardcore play, finding or crafting shuriken wasn’t a big problem. But in Hardcore, there just aren’t that many stars. You get the useful Sworn Silver and Ethereal weaponry, each with a red augment slot, with just a few ingots from the Borderlands. But the next named star is the Shadow Star from the level 3 quest chain, Seal of Shan-To-Kor. And naturally, you want to run these quests at as high level as possible for favor used to receive your Hardcore rewards–if you survive. So farming at-level is a very risky thing, even with the guaranteed list of all named gear from the chain if you dare to run it three times, even on Normal difficulty.

Because crafting is a time-luxury no one has in Hardcore, Stela is stuck to what damage she can generate through any enhancements or feats. Based on Firewall’s old Shuricannon build, I’ve tweaked the build a bit with the use of the Falconry universal tree for crowd control. But that tree doesn’t add any weapon damage effects.

It’s good that there is an artificer in our party, which can give elemental weapon buffs that noticeably add damage. But I can’t always expect an artificer in party. The Shuricannon build used both Ninja Spy Sting of the Ninja and Drow Venomed Blades enhancements for whopping poison damage on many enemies. But that’s not enough.

My experiment with Feydark Illusionist came up with nothing. Its Shadowblades imbuement for weapons is simply a +1 enhancement bonus.

So I’m going to invest in a bit more from the Henshin Mystic tree to fight to survive: Lighting the Candle. It’ll add Fire and Force damage to the stars. To get that enhancement, I’ll need to spend 10 AP, but in the process I’ll also get Contemplation for +1 passive ki regeneration needed for using the Ten Thousand Stars ability, and more ki with the extra Concentration skill points added.

I better enjoy TTS while I can; the new updates coming may change how Shuriken Expertise and Ninja Spy’s similar ability provide burst or ranged damage, mostly in part to reduce lag, which I understand.

Petracletica is an excellent scout at level 7 with one hireling to help, deadly when she adds more virtual party members as meat shield combatants, giving her time to assess what is going on. She’s already entered the Feywild and scored a Rockslide Ring. Shadowblades are a godsend in Hardcore since they’re nothing but Force, which blows through most damage reduction and incorporeality. Additional Feydark Illusionist enhancements to add permanent Concealment and Shield are equally helpful.

But now the next challenge: Getting through Splinterskull. The need for an emergency Death Ward option is vital as we approach Level 9 and far more dangerous mages.

And Petra is still not sure if she can hold out a balance of DEX high enough for Reflex saves and weapon to-hit/damage in coordination with WIS for sticking finishing moves, given that higher CON is really needed for more HP. Hopefully one of the rewards of the Mimic tokens, a belt, might be useful to boost her health situationally if she can get enough tokens after fending off mimic after mimic.