Keeping a Solid Safety Margin

One boss. One player. No backup.

One boss. One player. No backup.

Like her namesake, Kiricletica’s solo grinding is building up a safety margin to help her as she moves more and more to Elite quests as a matter of course.

In Sword Art Online, the hero kept himself at least 10 character levels above the floor level he challenged (where the game world had 100 floors). This is more akin in levels to what perhaps “World of Warcraft” does than in Dungeons & Dragons games where 30-40 is the ultimate character level (depending on your game edition or rules).

So what’s a suitable safety margin for Kiri’s gameplay without becoming overpowered? Can a solo player really get overpowered since it’s always you alone against everything?

More Power, More Balance

For part of that answer, I think I’ll defer to the experience system.

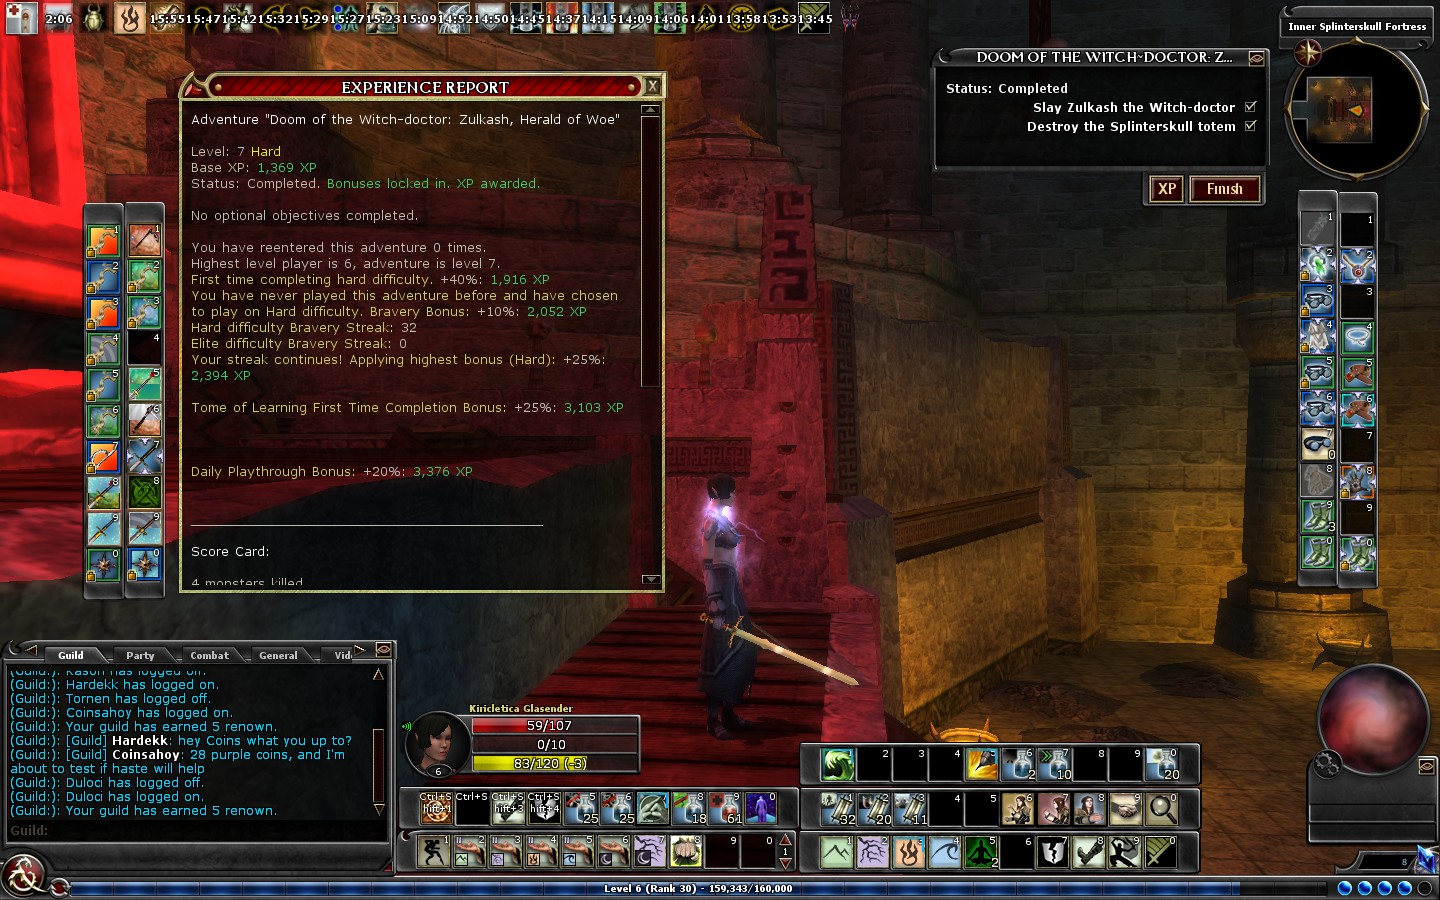
In DDO Wiki, the amount of experience gained versus character level is explained thus:

Level of quest vs level of highest character in quest: (party) Compare the quest's level to the level of the highest-level character to have entered the quest (even if they later left). If that character's level is below, equal to, or one level above the quest's level, there is no adjustment. If it's +2, there's a -10% penalty. +3 = -25%, +4 = -50%, +5 = -75%, +6 = -99%, and at +7 or higher there is no XP regardless of bonuses. Casual difficulty subtracts 2 from the quest's level (if possible) for purposes of this adjustment, Hard difficulty adds 1, and Elite adds 2. Solo difficulty does not affect it.

Kiri’s goal. optimally, is to complete quests at no greater than two levels higher than Elite as a general rule, primarily to gain a decent experience reward. But some quests are absolutely far harder at-level, or even with a couple of character levels above Elite’s 10% penalty.

Kiri’s goal is not to level fast, but she shouldn’t complete quests with greater than 4 levels or she’ll blow quite a few experience points: more than 50%. Remember also that Kiri generally avoids optionals, Ransack and kill bonuses so that experience is also lost to her.

The second half of a good safety margin involves an effective offensive/defensive balance. Kiri’s at Level 9 but has had serious issues with a few Level 6 quests on Elite difficulty. There are many factors. She’s the only target. Her defenses at this point are lower. Her offensive powers, save Wave of Despair (mass negative level effect) don’t yet include Cleave or Great Cleave. She  also hasn’t much in hit points.

For quick damage, her Sneak Attack bonuses need to improve (including wearing items) and I need more WIS for saves, ki and defense, as well as later to ensure that Quivering Palm sticks to quick-kill isolated targets. Power Attack and Cleave is needed for quests that require fighting in the trenches. She’s added Unbalancing Strike for its diversion ability for Sneak Attack power.

Lastly, Kiri’s defenses are light on AC. That might improve in a bit with some gear upgrades, but I really need to absorb more damage than I am at present, meaning that I need 60 AC or better by level 12.

The primary skill she has is the ability to sneak about, even in very close quarters, to evade enemy detection. But when she is detected, oh boy. For that reason, often Kiri has had to downshift to Hard difficulty for some adventures and return to fight another day for an Elite completion.

The main challenge is kill avoidance where it is allowed, no matter the quest or character level. If the objectives are something like “Slay everything in sight” (as with quests like “Kobold Assault”) then Kiri can take or leave that quest, completing it for house favor if desired, no matter the quest level.

Paralyzing swords and handwraps will be the thing, but the Envenomed Blades will likely be her go-to weapons for special reasons below.

The Way of the Ki Warrior

Like Quintessica the Mystic before her, Kiricletica must weaponize all aspects of ki for defense and attack.

Most Monks use a Stunning Fist here, a Quivering Palm there. Going solo, I have to start wielding ki like a Jedi manages the Force. A Ninja Spy is now quite equipped to do this, I think, with the right timing.

After fighting through “Archer Point Defense,” a timed quest where slaying is mandatory, I learned a few things about Kiri. For one, the Ninjitsu effects are going to help immensely once I improve on more WIS. She already has Wave of Despair for mass-negative levels that go a long way in weakening a larger force.

With realizing the sheer power of poison from Szyncletica’s star-throwing, I’m going to improve on injecting and forcefully pulling Ninja Poison more and more, especially since Kiri uses long- and short swords for greatest damage. Aside from Wave of Despair, Ninjitsu is better against single enemies but could be useful against smaller mobs.

Impending Doom: A quick way to pull 25 ki and 25 HP back. Tactically I can’t see how this is economical since you’ll spend more to build this up, but it might come in handy. The DDO Wiki description seems to be missing what detriment this effect gives to any enemy, if anything.

Poisoned Soul: On a failed saving throw, your Touch of Despair finisher also causes your opponent to gain a stack of Ninja Poison every 6 seconds for 30 seconds. Ninja Poison from normal weapons only injects a stack on a critical hit. This will force several stacks into an enemy. Weapons that add poison, like Envenomed Blades, will gain advantage here since Ninja Poison increases poison vulnerabilities.

Poison Exploit: On a failed saving throw, your Touch of Despair finisher purges an enemy of Ninja Poison, dealing 1d20 poison damage per stack of Ninja Poison removed. Once you have an enemy with DOTs of 50 or more from poison damage, this ability will quickly magnify the damage. I think you can get up to 20 stacks of Ninja Poison into something, so this is a potential of 20d20–worse with vulnerabilities.

Poisoned Darts: Not a Ninjitsu skill but a core ability. I see myself using this against a small mob, injecting a mob with Ninja Poison before smacking enemies with more poison from any weapons and other Ninjitsu.

Of course, there’s also Touch of Death by Level 12 or so for more punishment.

All of this means that more and more WIS is essential.

Upcoming Adventures

But this does leave a set of quests where the victory will be rather Pyrrhic as a solo player just won’t have every ability handy to fully complete it at-level or at all and will need to go in as powerful as she can be. These include:

  • Phiarlan Carnival: Some quests, like “A Small Problem,” are challenges of kill power while guarding Brawnpits. Others, like “Partycrashers” cannot be fully completed since I’ll lack sufficient Diplomacy until around level 12 or higher.
  • Necropolis: Here’s my deep, dark secret. I’ve never completed the entire Necropolis 1-4 quest series on any character, ever. As such, I’m going in blind as a bat for some of the quests. I know some have multiple switches or require splitting up a party, which means that I’ll not be able to complete them without suspending my self-imposed rules for that quest.
  • Assault on Stormreach: The first three quests are solo-capable. It’s “Siegebreaker” that’s going to be a bear since the final fight is a small area where you’re going to be the inevitable center of attention. Perhaps a summoned creature might aid me here, but it runs the risk of frakking up the center puzzle I’ll have to solve.
  • Raids: I have “The Chronoscope” in line to try, and “Tempest’s Spine” as well. I have no idea if I can make “The Reaver’s Fate” work in solo mode. And let’s not bother to go any farther than those for now.
  • Devil Battlefield: With the right weapons, Kiri might live there. It’s “Genesis Point” and “A New Invasion” that give me pause. “Genesis” has switches that require a 2nd person to do and I’ve never gotten my graphic settings right to target them for a hireling to use from afar. “Invasion” isn’t bad in terms of the maze. What worries me is the boss, a very angry, cursespewing pit fiend in a room of trapped death where Kiri’s battle healing may prove inadequate.

There are quests I’m looking very forward to completing as a solo stealth character.

  • Blockade Buster:  I hope to get a high enough INT to leave via the mine bays, but it’s not required. My challenge is to end the kobold engineers before they raise any alarms. The no-alarm objectives are the only ones I’ve never completed. Since the quest supports high-stealth, this one’s mine.
  • Frame Work: Devious bonus of 5 monsters to kill means I have the boss to slay with a margin of four others that are caught in my wake, in a quest where killing a hundred minotaurs means you’re only getting started.
  • Claw of Vulkoor: Another quest with great stealth-rewards.

I’m pumping Kiri’s Hide/Move Silently scores to insane levels for a Heroic character. She’s near 35 now at level 9 with a few buffs. I’d love to have her at 50 by level 12–that’s Epic-level numbers that should really help against Spot checks at the sneak speed she can do. Jump and Tumble also needs a boost to overcome the -20 penalty on both skills, with Jump a priority.

It really seems that I’ll need to be 3-4 levels higher than the quest in order to survive, even with stealth tactics. And if I don’t build up my overall attack options, Kiri is in for a rougher ride.

Kiri and Redwillow’s Ruins

One of latest challenges with Kiricletica, the solo ninja that completes all quests without any parties and with as low a kill count as possible, is “Redwillow’s Ruins.”

I love the layout of this quest. In the usual way most people play it, you slay stuff, grab the personal effects of the doomed halfling party, visit the Drow encampment and slay them, perhaps enter the caves with a good Rogue to disable traps for some extra loot, and then take on a swarm of giants and kill their boss.

Kiri’s mission is sizably different. The required objectives, in short, are to retrieve all the personal effects and then kill Tor’gahn, the giant boss.

In theory, I shouldn’t have to kill anything except Tor’gahn. John B. noted in my last post to the contrary, however. Each of the effects is guarded by a boss. I’ll need to isolate and kill each boss and then somehow attempt to recover the items while some mobs may still be lurking.

Going in on Elite difficulty on this level 6 quest, Kiri’s Hide/Move Silently powers will get their ultimate test to-date. While the enemies overall have greater Spot bonuses commensurate with their CR (probably 10-12), it’s the giants that pose the largest challenge. Many giants possess See Invisibility, which prevents me from lingering close to them, even hidden. Again, John B. noted that these giants aren’t equipped with See Invisibility.

I figured that if I see a giant less than 3 giant body-lengths to me, I need to move away, fast. I’m pushing 30 to H/MS and hope to move it to as high as 36 or so with the Voice of the Master, the Elite Spider Cult Mask buff, and Greater Heroism potions if needed.

The Hide/Spot check is proportional to the size of the thing looking your way. After the new stealth AI went live in Update 19, I’ve noticed that giants see me and party members from way, way off because their size allows a far longer Spot visual arc.

I’m as fast as I can go with Striding items, gained a bit more Monk movement speed, and have maxed out Faster Sneaking to help in power stealthing this one.

I needn’t worry about the giants until the last part of the quest. For now, the most immediate task was to figure out how to distract the various guards around the personal effects. There are some breakables near some of the effects, so I’d have to use them carefully to lure enemies away and then move in fast to pick things up, almost without stopping.

Kiri will go in at level 9, so her level advantage on Elite at quest level 8 won’t be particularly significant. After a bit of rearrangement of action points, Kiri now possesses better passive ki regeneration to keep Shadow Veil available as she wants it, after maxing out the Henshin Mystic ability, Contemplation, to go with her maximized Ninja Spy ability, Stealthy, for a +2 passive bonus that should give her up to 50 stable ki.

The Mission

John B.’s intel was correct. The effects weren’t there, but the bosses were around. After studying things a bit, I decided to back up very far and then use a throwing star to piss off the guard.

It worked. I was able to pull the first boss, a troll, away from the pack and slay him. The first personal effect appeared. I grabbed it while invisible and moving after targeting it. One down.

ScreenShot01022Next came the trolls. Three effects to pick up. Carefully walking the edges off the trail to avoid spawning the scorpions, I successfully pulled the boss troll and slew him.

It took a bit of work to lure away two trolls near the effects without slaying them, but I got it done. Two sets of effects to go.

ScreenShot01023I pulled a relatively solitary hobgoblin boss for the next to last of the effects, but it took some careful targeting (after turning off autotargeting) of the last boss from extremely long-range to isolate and kill him.

A quick use of Shadow Veil and targeting the sealed container in a run and I had all the effects with only 7 enemies killed.

After handing off the personal effects, it was time for Tor’gahn. Buffing up with Sneak and Shadow Veil, I walked forward and into the portal.

Giants and hobgoblins were all about waiting for a fight I was able to deny them. I made a beeline to the boss.

Apparently the bulk of the giants that greet you at the portal make their start from the boss. I confirmed this with a near-nasty surprise as the mob returned to guard the boss–at least 8 giants.

ScreenShot01025With few options, I moved around the mob and behind Tor’gahn to study an idea.

If I could use the terrain and a few obstacles, I could fight Tor’gahn while obstructing the fight from most of the other giants.

It worked for the most part. I got a few licks on Tor’gahn before a few other guards joined in. I broke the fight and then hid near a giant relic. Surprisingly, neither the boss or any others followed. I pulled out my Snowstar and threw.

In a few moments, the boss was dead. I got a Devious bonus for only 8 kills on a quest that has a Conquest for 146 enemies. Guess I need to update the DDO Wiki again with the news.

ScreenShot01026

ScreenShot01027

Kiri and the Attack on Splinterskull

Kiricletica, the solitary ninja, completed the Assault on Splinterskull chain using some creative means. Using stealth tactics whereever possible, it was extremely fun to complete these repetitive quests once more.

Since it’s a long chain where combat on some areas is required, I’ll summarize the highlights.

First Strike

On this first quest I reacquainted myself to the main path, learning where I’d have to fight and opportunities not to fight in later visits. You’re required to kill 20 hobgoblins  so I didn’t send any time of significance in stealth mode.

There are always two to three spiders that appear as you enter Splinterskull cave that you cannot bypass. After time I realized I could kill them in Fire Stance for a boost to my ki pool for using Shadow Veil (more on this in a moment).

The Hobgoblin’s Captives

ScreenShot00988This was my first stealth opportunity. I botched an attempt to bypass the first group of hobgoblins but learned a way to do so that I’d apply later.

I wanted to bypass as much as possible in the side rooms to reach the captives. Of the 125 enemies I could’ve killed for Conquest, I needed to eliminate only 14 to gain my first Devious bonus.

The trick was the use of Shadow Veil, here and throughout later quests. It allowed me to move much closer to patrols since its invisibility greatly reduced the Spot bonus unless I got within a body length.

ScreenShot00989I used levers and spoke to each captive to free them.

Those actions made no noise, despite their guards standing very close in front of their cells, completely oblivious.

Yarkuch’s War-plans

This one required combat to obtain each set of plans.

Out of at least 74 enemies available for an Onslaught bonus, I needed to kill only 27 (2 killed themselves).

I didn’t activate any kill bonus, so it wasn’t a poor achievement.

Whisperdoom’s Spawn

More inescapable spiders. By now, however, I’d mastered how to bypass the first mob by using a shuriken to break a box left of their first hallway entrance, then skulking to the group’s right as they investigated. Shadow Veil allowed me to bypass worgs and hobgoblins in the next two halls.

ScreenShot00992But inside the largest hall before the circular caves sat one of the three daughters of Whisperdoom. I threw a star at it to pull it out of the hall and kill it before it revealed me in the larger hall.

The patrols in the circular caves (where you later use the sealed door to the inner stronghold) start at a fixed spot each time, allowing me to activate their patrol and walk behind them if necessary. I was able to completely avoid them and enter Whisperdoom’s cave.

ScreenShot00993After luring out the two black widows that guard the final room, I ranged as many of the 20 eggs before Whisperdoom got in the way and I had to bludgeon the rest. Out of a possible 63 kills for an Aggression bonus, I slew only 7 for another Devious bonus.

I’ve been updating DDO Wiki’s information for this and each quest to add Devious bonuses. Apparently, no one’s tried to try for these achievements before.

The Deadly Package: The Stronghold Key

With my stealth tactics perfected, I needed only 7 kills for yet another Devious bonus out of at least 64 available for Onslaught. I avoided all but the last Hobgoblin Avenger, who died after I reached the inner entrance and had made the completion.

The Deadly Package: Agent of the Darguul

This one is very short but has quite a few guards by the raised bridge. I used a star to drop the bridge and then moved undetected to speak to Lhor-Tragu to complete with no kills and an Insidious Cunning bonus, the best score you can get in a stealth run.

I was feeling cocky for the next two quests.

Doom of the Witch-doctor: The Way to Zulkash and Zulkash, Herald of Woe

I bypassed all but 7 enemies to reach the inner stronghold entrance for a Devious bonus.

In “Herald of Woe” comes the four wheels to set to drop the barrier to Zulkash and his totem. I avoided any kills as I made my way over the guarded bridge and waterway, into the first set of inner halls and past the former holding area of the flesh render.

But how to activate the four wheels?

I tried a variation on my diversion technique. Out of line of sight, I broke a crate, used Shadow Veil and sneaked over to the first wheel to turn it once. To my pleasant surprise, using the wheel neither broke my stealth or invisibility.

ScreenShot01005I diverted the second wheel using another crate to distract, turning it four times. The third wheel was trickier with more enemies and spread farther apart, but I succeeded on this. Still no kills.

The last wheel had too few breakables. Thanks to auto-targeting, I hit two enemies and had to eliminate them. But I was able to skulk to the wheel and avoid dispatching two other guards.

Now for the final room and Zulkash.

ScreenShot01008I buffed a bit and then entered the room, climbing up to where Zulkash stood by his totem. I slew him and, evading others to avoid increasing my kill count, I made it up to destroy the totem to complete this quest.

Out of a possible 75 enemies slain for Onslaught, I killed 4–the totem counted as one itself–for a Devious bonus.

ScreenShot01009That completion was absolutely incredible; I never thought you could complete that section with so few kills.

After this run, I was only 1,000 or so points from level 7. A quick series of slays in the Searing Heights completed that requirement so I could boost my skills and wear a Cloak of Shadows to bring my Hide/Move Silently scores to nearly 30. I was going to need that advantage. The last two quests were completed on Hard,  a level 7 difficulty I completed at level 6. Going in on Hard again for the final quests, I’d be a level 7 in a level 8 difficulty.

The Way to Yarkuch and Yarkuch’s Last Stand

Time for the last two quests in the chain. For this last run, I decided to capture the entire run for your review, specifically, how to evade the mobs on the path to the inner stronghold, and then the final quest itself.

The final quest mixes things up to avoid fighting. I managed a Discreet bonus. I couldn’t add the last minutes after completion due to YouTube video time constraints, but it’s clear how few enemies I had to kill to reach it.

Kiricletica is getting pretty versatile. Adding more Sneak Attack damage will help to quick-kill some things in the future. She should be able to move to Elite quests on a regular basis as she approaches level 9.

Kiri and The Kobold’s New Ringleader

With one character newly created and built to run as many quests as she can without any party/hireling assistance, I began completing several Harbor quests.

One that I thought would require me to be resourceful to meet my stealth challenge goals is “The Kobold’s New Ringleader.” In this quest (and with many to come where slaying is often a requirement), complete stealth is impossible. Rather, I switch to an infiltration mode.

In infiltration, you may have to actively kill but only enough enemies to proceed to the goal. If you can evade fighting, you should do so. Often, however, there are just too many enemies about that will detect you.

Infiltration will be easier later as Kiri’s Hide and Move Silently skills outstrip enemy Spot levels and as her Faster Sneaking ability (with better Striding/Monk movement speed improvements in tandem) reduces her chances against a Spot check.

I’m still burdened with Windows Movie Maker as my editor. This will be the last darker video as I think I’ve gotten a grip on the brightness and gamma settings.

Highlights:

  • This quest is very high on breakables. In keeping with the stealth goals, few were touched.
  • To avoid fighting unnecessary sections of the quest, I leapt through the opening in the large barricade ahead of the quest start.
  • What breakables I did use, I used for diversion. Scan to time point 3:00 to see how this was done. In the new stealth AI, monsters will move to investigate any sounds where they can’t see a target. With plenty of barrels to smash, I used them not only to allow me to pull a switch inside a guarded room, but also to use the same trick to distract the kobolds on my way out. I will be using this scheme a lot as her adventures continue.
  • I would’ve done better at time point 8:15 in distracting two packs of kobolds. I moved one pack within the now-opened door to the ringleader, but I should have tried to lure down the kobolds sitting in the final hall to the ringleader’s door. If I would’ve struck a breakable while staying out of sight to the left of that hallway, towards the boss room, I could have entered the shrine on the other end, stuck a box inside, and lured the kobolds there as I sneaked out again.
  • The final fight has a small pack of kobolds and one mini-boss before the ogre boss. I did kill the boss and avoid getting the last of the runts not counted in the kill score. Still, I had to slay half of the quest’s population to complete.

Recap on Other Quests

I completed “Where There’s Smoke” at Hard difficulty. This is the “save the farm, save the dogs” quest in the Cerulean Hills. Killing is inevitable here because of the patrols and the erected barrier near the start. However, avoiding the dogs, I was able to evade many patrols to get to the farm. In trying to stay hidden, I began to discover nooks and crannies throughout this quest that I’ve never noticed before. Very insightful stuff. I hope to rediscover features such as these to use in other quests that even flower-sniffers may not notice. One thing I learned I could do was to jump over the fences of the farm main entrance and the farmhouse itself, rather than destroying the doors. I did have to kill all the orcs that spawn at the farmhouse to complete the quest as a required objective. Given the heavy mobs in this one, I was pleased to come out alive and without an Aggression bonus–my goal when Devious or better low-kill bonuses aren’t possible.

Also completed was the Waterworks chain. I did film part 1 of this quest and learned something interesting about the “Rescue Arlos” quest. You recall the multiple raised bridges that you think you need to drop to enter into the various hallways? Well, I just jumped in the water and then leapt up to one passageway. I still had to double back to kill the guards at that nexus, but without a bridge dropped there until I chose to drop it, they couldn’t leave to chase me.

The quest almost went pear-shaped as I escorted Arlos, as he found not only the last group of kobolds in the nook before the bridge, but a acid-cloud spamming mini-boss shaman. Thankfully I did buff Arlos a little as a precaution and he did survive to complete the quest.

Part 2 of Waterworks was just ugly in terms of stealth or infiltration and had to be essentially played as most would play it since respawns, oozes and close quarters with required kills prohibited a more promising run.

Also completed were “The Captives” in Cerulean Hills, successfully keeping the kill count down, and a modest success in the Baudry Cartaman series that added some experience in avoiding vigilant kobolds.

Kiricletica reached Level 6 with completing Waterworks. Now she can go invisible and incorporeal with Shadow Veil, has Two-Weapon Fighting and can use her longswords as ki weapons. Delicious.

Next time: DDO “Groundhog Day”, and encounters with pirates–a ninja’s worst enemy.

The Self-Imposed Stealth Solo Challenge

I’m a very big proponent of stealth tactics in quests.

I know that doesn’t go down well with many adventures in DDO, but usually, the joy of slaying is lost on me. I kill enemies because they will try to kill me. Often, I must initiate attack. If I am attacked first, I ensure I’m the last one standing to finish it.

So, with a serious case of altitis with a little boredom kicking in, I’m considering a game for myself that others can play along as well. I’m inspired by two sources. First, from the creator of the DDO Character Planner, who had begun this some time ago.

The second inspiration is from a popular manga/anime show.

The rules are simple:

  • Do not kill except when
    • A required objective requires it
    • Stealth is not an option (enemies can often or always detect you, such as wraiths and spiders)
    • You are revealed/unable to hide and you are fighting for your life
  • Do not smash breakables unless it is a required objective; this makes noise that attracts enemies
  • Reveal yourself only when
    • A required objective/condition of passage is activated only if you are visible (to prevent bugging a quest)
    • Aggression or diversion is required to complete an objective
  • Complete the mission without assistance (no hirelings) unless an objective requires additional party members for levers and switches. Assistance will be dismissed or left idle after levers are completed
  • Discreet (5% or less), Devious (7%) or Insidious Cunning (10%) kill objectives are required where possible.

To meet the “no kill” objective will require taking advantage of the game’s improved stealth AI. Enemies now respond to noises more reliably and go to the sound to investigate. In narrow corridors where enemies block the doorways, noise could be used to pull the enemies away and allow an adventurer to pass by. Alternately, a character can use a single attack or quick reveal to pull enemies towards them. If you can break the line of sight of these enemies and then hide and go quiet, the enemies often pass you by, searching for you in vain briefly before often returning to their original positions.

It will take my best Ninja Spy to make this work. My fondest characters (Syncletica, Lynncletica and Ryncletica) have Epic levels and have been idle for some time while my star-thrower mania has continued unabated for weeks now.

But which character should enter this game? I’d likely dedicate only one character to complete this, from level 1 to 28ish.

I strongly considered Syncletica herself. She’s been largely idle since her first TR and horrific results as an Epic character.

Ryncletica is already a strong general Ninja Spy and would enter a third life to try this.

In the end, I generated another Ninja Spy. Inspired by Sword Art Online‘s “Black Swordsman” and central character, Kirito, the player character Kiricletica is now skulking the dungeons.

As the build goes, Kiri isn’t very special except I’m adding longswords to her ability for slashing damage, befitting her namesake. Every ability to stay hidden or divert attention is getting maximized.

Every Trick in the Book

I’m not quite utilizing every condition of RJ’s attempt. While his goal was to fully complete all quests, including optionals, I’m sticking to the required objectives only. I’m using ship buffs and I’ve equipped Kiricletica with some starter equipment with the goal of her gathering her own later.

Since I’m attempting each dungeon on Elite and within 2 levels of the quest difficulty, any gear she attains from other characters, should I choose, essentially evens the odds, not increases them.

Self-healing is a critical consideration in solo play, but thankfully is going to be less problematic since Kiricletica is Half-Elf with the Cleric dilettante to allow scroll and wand healing as well as good protective buffs. Several points are going into the Shintao and Mystic trees for greater ki regeneration, healing amplification and improved DCs.

Kiricletica will need an improved ability for ranged damage to avoid some fights. While she won’t be as powerful as Szyncletica,  I’m using all I’ve learned of the Shiradi Shuricannon build to boost Kiri’s DEX very high for improved damage and attack as well as shuriken throw rate. I might add Shuriken Expertise while adding in Cleave and Great Cleave. The Two-Weapon Fighting feats are important but I don’t know if taking all three will be essential.

Kiri’s already equipped with a Phiarlan Mirror Cloak,  a great item for new characters to improve Hide/Move Silently skills. Spot will get a boost, and Diplomacy where possible for avoiding some fights.

From here, it’s all tactics.

Stealthy Repossession: The Dreaded

Many players in groups either skip this quest altogether or use tactics that keep the precious kobold prophets busy enough so one person can zerg in to grab the gem that completes the quest.

I chose to do things the old fashioned way.

I entered in as a level 4 character on Elite. My first mistake was walking around as I activated a buff or two. On opening the first door, two ordinary kobolds and one prophet attacked and had to be put down. I still had a safety margin of prophets, so in I went.

The key in stealth is often to follow the paths of those you avoid. Staying behind them keeps you out of their visual arc, their line of sight. You also need to avoid sneaking too closely for their Listen skill to hear you take that misstep.

The second prophet guards a wide main hall with two gated passages. The little guy makes a lazy clockwise walk around the area, so I follow him and, while he’s at 3 o’clock and I’m at a the lever at 11 o’clock, I pull the lever, restealth without taking one step, and enter the west hall.

Two prophets walk in a slightly different pattern up and down this north-south hallway. Your only target is another lever on the west wall. Many other kobolds are sleeping.

This lever is the hardest of the six you must engage since you have to time pulling the lever with restealthing before the prophets are in Spot range. Hopefully you will restealth and be heading back north before the prophets turn around for their northern track, as you’ll want to pull that thing quickly as they pass. Thankfully, despite the sound effect, it seems that levers don’t make sounds that attract. Else, this quest would be clearly impossible.

I pulled the lever and sneaked back out, wary of the central hall prophet still doing his rounds.

On to a west hallway where a fourth prophet makes another patrol. Same tactic is used as in the central hall but you have to watch for when the kobold stops at certain points before turning and walking away. I let the kobold head more easterly and away from my objective, a door where another lever awaited inside. More sleeping kobolds. There were some boxes I was able to use to elevate myself out of some tight spots where my timing with the prophet was too perfect and his line-of-sight approached too fast.

Ahead to the east, a corridor leads to another room with a mix of sleeping kobolds, one vigilant thrower atop a tall pile of crates, and two prophets. Here, you have to move fast to get past this to fall down and to the right  into a lower room, avoiding the bridge ahead. Inside a recess are two switches to pull. Do not make one move without being in stealth here (or anywhere) as the prophets will hear you.

You must then head northerly, avoiding two more prophets, to the final switch. On this one, it may be best to use invisibility if you have a potion or effect, to gain an edge on Spot, since there are two last prophets and often one optional boss, a witch doctor. Activate the switch on the south wall, and then sneak in for the gem, located north and west from the last switch.

Sounds easy? I didn’t think it did.

Thanks to Micki, I’m now the owner of a Bandicam license, so here’s a recreation of that run with Kiri, now a little higher at level 5, in the first of a series of videos to help Monks work out their kinks in certain quests.

Here’s another successful but less glamorous attempt on that quest. My apologies for the darkened video; I’m getting used to the gamma and brightness settings as things get moved here and there.

How Far Can I Go?

As the character Kirito knew, there will be point where solo play is not possible, much less practical. Kiricletica isn’t designed to be an achiever of quest chains or gain accolades in leveling. Her only desire is to complete as much of the game as possible without any player character’s to assist. Raids would be the exception. Maybe.

The only challenges that will thwart her will be ones that absolutely require several live players to coordinate levers and switches. As much as I’m hopeful of Kiri’s abilities, being in two places at once isn’t one of them.

Perhaps I’ll be able to get a Devious bonus in “The Kobold’s New Ringleader.” You never know.

(Update: I apologize for the video quality. Serves me right for using Windows Movie Maker, free as it is. I’ll be improving the video quality as I find better options. This thread, older as it is, still has some tips.)